Last Update:
When you're finally standing in the tile aisle, keep it simple: go for PEI 4 for the floor and R10 for safety. If you're doing the splashback, stick to porcelain or mosaic tiles—they're basically bulletproof against stains—and try to go large-format to keep those grout lines to a minimum.
Form Meets Function: The Kitchen Tile & Style Essentials
Choosing a kitchen tile isn’t just about the ‘look’; it’s about finding a surface that can survive heavy footfall, dropped pans, and red wine spills without flinching.
In 2026, the best kitchens balance tactile, organic style with high-performance durability. This guide cuts through the jargon to help you choose a floor and splashback that works for your lifestyle, your budget, and your home.
The Foundation: Durability & The PEI Rating for Floor Tiles
In the kitchen, durability isn't just a perk; it’s a requirement. The industry standard for measuring this is the PEI (Porcelain Enamel Institute) rating, which grades a tile’s resistance to surface abrasion and wear.
💪 PEI 3 (Moderate Traffic)
Suitable for standard residential kitchens. It handles daily footfall but may show wear over time in high-impact areas.
🦾 PEI 4 (Heavy Traffic)
The ‘Gold Standard’ for modern kitchens. These tiles are designed to withstand the grit, sliding furniture, and constant activity of a busy family home.
🛡️ PEI 5 (Extra Heavy Traffic)
Typically reserved for commercial spaces, but an excellent choice if you want a floor that is virtually indestructible.
💥Pro Tip: For a kitchen floor that stays looking new for a decade, aim for a PEI 4 porcelain tile. It offers the best balance of sophisticated design and ‘life-proof’ resilience.
Safety First: Slip Resistance (The R Rating)
In a kitchen, the ‘wet zone’ is everywhere. From dishwasher steam to accidental spills, your floor needs enough grip to prevent a slide. This is measured by the ‘R’ Ramp Rating, which scales from R9 to R13.
❗ R9: The Bare Minimum
Fine for dry areas, but can be treacherous in a kitchen if the floor gets wet.
‼️ R10: The Kitchen Standard
It offers a subtle, matt texture that provides reliable grip for everyday spills without being difficult to mop.
⚠️ R11: The Safety First Choice
Best for open-plan kitchens that lead directly to outdoor decks or for households with young children and pets.
💥Pro Tip: Avoid high-gloss tiles for kitchen floors. While they look stunning in showrooms, they become skating rinks the moment a drop of water hits them. Stick to a Matt or Honed finish for peace of mind.
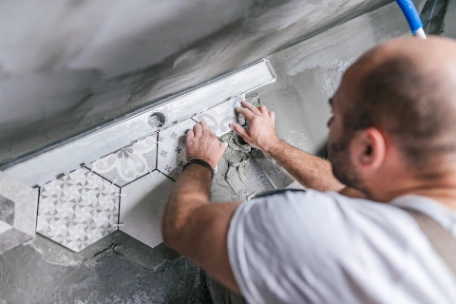
Types of Tiles: Porcelain vs. Ceramic vs. Natural Stone
Your choice of material dictates your kitchen’s maintenance schedule. While they might look identical on the shelf, their DNA is very different.

Ergonomics: Comfort Underfoot
In a kitchen, you aren’t just looking at your floor; you’re standing on it. Hardness is great for durability, but it can be taxing on your joints during a long afternoon of meal prep.
💥 The Impact Factor
Porcelain and stone are unforgiving. If you spend hours cooking, consider a textured or matt finish which can feel slightly less 'slick' and hard than a high-polish surface.
🌡️ Temperature Control
Tiles are natural heat conductors. They can feel icy in winter, making Underfloor Heating (UFH) compatibility a key consideration.
🥂 The ‘Drop’ Test
Remember that the harder the tile, the less likely a dropped glass is to survive.
💥Pro Tip: Always check if your chosen tile is UFH Compatible. Most modern porcelain is perfect for this, turning a cold, hard floor into the most comfortable surface in your home.
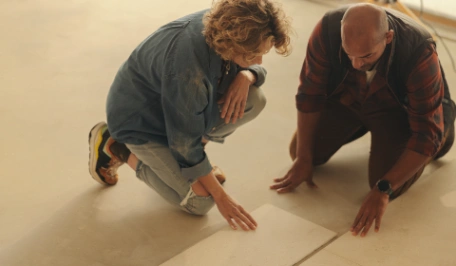
Visual Mechanics: Size, Scale & Grout
The dimensions of your tile can manipulate the perceived size of your kitchen. It’s an optical illusion that can make a cramped galley feel like an open-concept masterpiece.
📐 The Large Format Rule
Bigger tiles mean fewer grout lines. Reducing these visual breaks creates a seamless, continuous plane that makes small floors appear much larger.
➡️ The Directional Flow
Planks (like wood-effect porcelain) can be laid parallel to the longest wall to elongate the room, or diagonally to draw the eye outward and break up boxy layouts.
🎨 The Grout Cheat Code
Match your grout colour as closely as possible to the tile. If the grout disappears, the boundaries of the tiles vanish, further enhancing that sense of space.
💥Pro Tip: For a modern, high-end look, aim for rectified tiles. These have machine-cut, 90-degree edges that allow for ultra-thin (1–2mm) grout lines, giving you that sleek, slab-like finish.
Maintenance & Reality: The Tomato Sauce Test
Before you commit, you need to move past the showroom lighting and consider the ‘Sunday Dinner’ reality. Your kitchen is a splash zone, and your tiles need to be ready for the inevitable.
The Porosity Check: Protecting Your Natural Stone Splashback
If you’re leaning towards Natural Stone, remember it’s essentially a hard sponge. Without a high-quality sealant, that splash of Bolognese or red wine will become a permanent part of your floor’s history.
Textured vs. Cleanable: Finding the Practical Wall Tile Sweet Spot
While a heavy texture provides great grip (R11+), it can also trap dirt and grease. If you hate scrubbing, look for a Honed finish; it’s the sweet spot between safety and a quick 30-second mop.
Grout: The Real Enemy: Choosing the Right Sealant for Your Splashback
The tile isn't usually the problem; it’s the grout. Always opt for Epoxy Grout for splashbacks or high-spill areas. It’s non-porous, meaning it won’t absorb grease or stain over time.
☝️ The Reality Check: Take a sample tile home. Smear it with tomato paste, leave it for an hour, and wipe it off. If it leaves a ghost of a stain, it’s not the tile for your lifestyle.
Budgeting Beyond the Tile
The price on the sticker is only half the story. To avoid ‘budget creep’, you need to account for the hidden essentials that turn a stack of boxes into a finished floor.
💲 The Waste Buffer: Factoring in Extra for Mosaic & Intricate Cuts
Never buy exactly what you measured. Always add 10–15% extra for cuts, awkward corners, and the inevitable ‘oops’ moment during installation.
💲 The Substrate Secret: Preparing the Surface for a Level Floor Tile Installation
If your subfloor isn't level, your tiles will ‘lippage’ (stick up at the edges). Budget for self-levelling compound or backer boards to ensure a flat canvas.
💲 Adhesives & Grout: The Invisible Essentials for a Long-Lasting Backsplash
High-quality porcelain requires specific high-flex adhesives, especially over underfloor heating. Don't skimp here; the glue is what keeps your investment from cracking.
💥Pro Tip: Remember that labour costs often scale with tile size. Ironically, very large format tiles can be more expensive to lay because they require two people to lift and specialised equipment to cut.
The Bottom Line: Building Your Perfect Kitchen Floor
Choosing a tile is where your design vision meets the reality of a Tuesday night mess. To get it right, balance the 'Showroom Glow' with the 'Tomato Sauce Test'.
The 10-Second Cheat Sheet:
👉 Durability: Aim for PEI 4 (The Gold Standard).
👉 Safety: Stick to R10 (The Kitchen Standard) to avoid the 'skating rink' effect.
👉 Material: Go porcelain for a 'Fit & Forget' life; leave stone for the high-maintenance dreamers.
👉 Visuals: Use large format tiles and matching grout to cheat a small space into looking massive.
👉 Budget: Add 15% for waste and don't skimp on the adhesive; it’s the insurance policy for your floor.
📞 For more information or to book a kitchen tiler, call our friendly Tile For Life team on 04 1127 6281 or complete our enquiry form today.
