Last Update:
The most effective way to clean bathroom tiles is using a pH-neutral cleaner and a microfiber mop, as acidic solutions like vinegar can permanently etch natural stone and erode grout.
- Daily Maintenance: Use a squeegee after every shower to prevent soap scum and calcium buildup.
- Standard Cleaning (Ceramic & Porcelain): Mix warm water with a pH-neutral daily cleaner. Apply with a damp (not soaking) microfiber cloth to prevent dirty water from seeping into porous grout.
- Natural Stone (Marble, Travertine): Avoid all acids and bleach. Use only stone-specific cleaners to maintain the protective seal and prevent dulling.
- Grout Care: For deep cleans, use oxygen bleach or a baking soda paste with a soft nylon brush. Avoid stiff wire brushes which can scratch tile glazes.
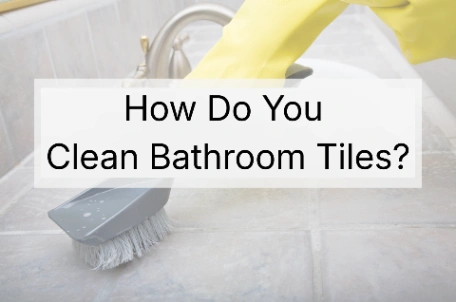
How Do You Clean Bathroom Tiles?
You’ve spent the money on beautiful tiles; the last thing you want is to ruin them by trying too hard. We see it all the time: people accidentally scrubbing the life out of their floors because they’re using the wrong chemicals or way too much elbow grease.
This guide skips the fluff and gives you the actual trade secrets we use to keep tiles and grout in top shape. From avoiding that 'sandpaper effect' to why a simple pH-neutral cleaner is your best friend, here’s how to keep your home looking just-installed for years.
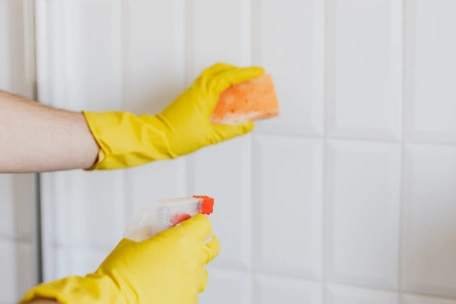
The Best Way to Clean Bathroom Tiles
Bathrooms are a bit of a nightmare because you’re dealing with two different problems: body oils and mineral buildup. If you’re just spraying and wiping, you’re usually just moving the grime from one spot to another. Here’s how to actually get on top of it:
Strip the Grease
Think of soap scum as grease—it’s mostly body oils. Use hot water and a dash of dish soap to break that film first. If you don't get that oily layer off, any other cleaner you spray on is just going to bounce right off the tile.
Clear the Cloudiness
After the grease is gone, if you still see a white haze, that’s limescale. Use a 50/50 mix of water and white vinegar to melt it away.
⚠️Warning: Never let vinegar touch natural stone like marble or limestone—the acid will eat straight into the surface and leave a permanent mark.
Let the Cleaner Sit
Spray your solution and walk away for 5 minutes. Let the chemistry do the hard work so you don't have to scrub like a maniac.
The Credit Card Trick
For crusty buildup around taps, don't use a knife. Flick it off with an old credit card—it's firm enough to move the scale but won't scratch your tiles.
Squeegee is King
The easiest way to clean a shower is to never let it get dirty in the first place. Take 30 seconds to squeegee the walls after your shower; it starves the mould of the moisture it needs to grow.

How to Clean Bathroom Grout
Because grout is porous, it basically acts like a magnet for soap scum and dust. If you're trying to get it clean without ruining the seal, the trick is actually patience, not just blasting it with harsh chemicals.
1. Start Gentle
Before you go out and buy heavy-duty cleaners, just try some warm water and a bit of dish soap first. Use a medium brush (an old toothbrush is perfect) to lift those surface oils without ruining the grout underneath.
2. The Baking Soda Method
If you’re dealing with tougher grout stains, mix up a bit of a paste with baking soda and water. Let it sit for 15 minutes before you scrub. It’s just abrasive enough to clean the area without scratching your tiles or gouging the grout like a wire brush would.
3. Why Avoid Bleach?
Bleach is a popular choice for whitening grout, but it’s usually a 'short-term gain, long-term pain' fix. Using it too often actually makes the grout brittle, which is why you’ll see it start to crack or crumble.
If you’re dealing with mould, a 50/50 mix of white vinegar and water is a much safer bet; just make sure you keep it away from natural stone like marble, because the acid will etch and ruin the finish.
☝️If your grout is beyond cleaning and has started to crack or crumble, you might need to look into bathroom tile repairs to prevent water damage.
4. Dry it Off
Once you've finished scrubbing, don't just leave it to air dry. Wipe it down with a microfibre cloth. If you leave standing water, those mineral deposits just settle back into the grout, and you’re basically right back where you started.
Removing Mould and Mildew from Showers
Mould is more than just an eyesore. If you leave it too long, it can actually get behind your silicone and grout, which can lead to some pretty nasty structural issues. Especially with our humidity, you want to make sure you’re actually killing the spores, not just hiding them.
Kill the Root, Don't Just Bleach It
Try to avoid the heavy bleach; it usually just turns the mould white while leaving the spores alive underneath. A 50/50 mix of white vinegar and water is actually way better at soaking in and killing the fungus for good. Just spray it on, give it 10 minutes to do its thing, then scrub and rinse.
Watch the Silicone
If you start seeing black spots showing up behind your silicone, no amount of scrubbing is going to fix it. It usually means the seal has failed and moisture is trapped underneath. Once that happens, the only real fix is to strip the old stuff out and re-apply a fresh, anti-fungal bead to keep it watertight
Prevention is Best
Honestly, the best way to deal with mould is to just not let it start. If you run your fan for about 15 minutes after you hop out and give the walls a quick squeegee, you're getting rid of the standing water before the mould even has a chance to move in. It only takes a few seconds, but it saves you hours of scrubbing later.
☝️If you find you're cleaning the grout every week and the mould just keeps coming back, it’s usually a sign the sealer has worn off—or worse, there’s a moisture issue trapped behind the tiles. At that stage, no amount of scrubbing is going to be a permanent fix.
Cleaning Specific Tile Types
Not all tiles are built the same. Using the wrong cleaner can actually do permanent damage before you even realise it, so here’s a quick cheat sheet to keep your specific floors safe.
Porcelain & Ceramic
These are the workhorses of the house, but they’re notorious for detergent buildup. If your tiles are starting to look cloudy or you’re seeing footprints every time someone walks across the room, it’s a dead giveaway that you’re using way too much soap.
✨ The fix is easy: just add a splash of white vinegar to your hot water. It’ll strip right through that soapy film and get the tiles looking like they did the day they were laid
Natural Stone (Marble, Travertine, Limestone)
Think of stone as basically a hard sponge; it’s incredibly porous. Whatever you do, stay away from vinegar, lemon, or those 'heavy-duty' cleaners. The acid will 'etch' the surface, leaving dull spots that no amount of scrubbing will fix.
✨ Stick to pH-neutral cleaners made for stone, or if you’re in a pinch, just a tiny drop of mild dish soap in warm water is plenty
Terracotta & Patterned Tiles
Terracotta and patterned tiles are a bit of a different beast. Because they’re often unglazed, they’ll soak up a wine or oil spill almost instantly. My biggest warning? Don’t go in with a soaking wet mop. Too much water can trigger 'efflorescence', that annoying white, salty powder that creeps up and ruins the finish.
✨ Keep your mop damp, not dripping, and whatever you do, make sure they stay well-sealed.
Dealing with Soap Scum and Limescale
If your shower glass is starting to look 'foggy' or you’ve got that crusty white buildup around your taps, you’re basically dealing with a nasty mix of body oils and mineral deposits from the water.
The Limescale Fix
For that stubborn white crust on your taps or grout, here’s a trick: soak some paper towels in white vinegar and wrap them right around the area. Leave them for about 30 minutes so the acid can eat through the calcium—after that, the whole lot should just wipe away.
The Soap Scum Secret
Soap scum is basically wax. Treat it like a greasy frying pan—use hot water and a bit of dish soap first to break down the oils. Once the grease is gone, the vinegar will easily clear the leftover haze.
The Stone Warning
Whatever you do, keep vinegar away from natural stone. It’ll eat into the surface. If you have marble or limestone, stick to a plastic scraper (an old credit card works wonders) to gently flick off the scale.
Common Cleaning Mistakes to Avoid
We see it all the time: floors that have actually been 'cleaned' to death. Most people have the best intentions, but a few common mistakes can actually age your tiles faster than they should. Here’s what to avoid if you want to keep that 'just laid' look for years.
❌ Avoid "Shine-Enhancing" Cleaners
Stay away from the supermarket stuff that promises an instant shine. Those products usually just coat your floor in a waxy film that feels okay at first, but eventually, it starts trapping dirt and makes the whole room look dull and cloudy. Once that buildup starts, it’s a nightmare to get off.
❌ The "More is Better" Trap
Adding extra detergent to your bucket doesn't make the floor cleaner; it just makes the surface sticky. That stickiness acts like a magnet for dust and hair, meaning you’ll be mopping twice as often.
❌ Abrasive Scouring Pads on Polished Surfaces
Taking a green scouring pad or steel wool to polished porcelain or stone is basically like taking sandpaper to it. You’re literally sanding the shine away. Once you’ve scratched the surface like that, there’s no "cleaning" it off; you’ll need a professional to come in and polish the life back into it.
❌ Bleaching the Grout
Bleach is a band-aid fix. It kills the surface mould and whitens the grout, but it's incredibly harsh. Constant use can actually eat away at the grout structure, making it sandy, brittle, and more porous than when you started.
❌ Letting the Water Get Too Dirty
If you’re mopping a whole house with one bucket of water, by the third room, you’re basically just painting a thin layer of grey silt over your tiles. Change your water as soon as it starts to look cloudy.
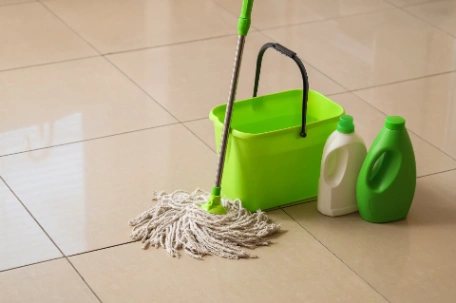
Summary Checklist: The Weekly Routine
To keep your floors looking like they were just installed, without losing your whole Saturday to a mop, just stick to this quick routine.
Dry Prep is Key
Never start with a wet mop. Use a vacuum (with the brush bar off) or a microfiber dust mop to get rid of grit. If you skip this, you’re just turning dust into sandpaper once the water hits.
The "Less is More" Mix
Fill your bucket with warm water and just a tiny squeeze of pH-neutral cleaner. If you see a mountain of suds, you’ve used too much.
The Two-Bucket Trick
It’s a bit more effort, but if you can, use one bucket for your soapy mix and a second one just for rinsing your dirty mop. It stops you from just moving the same dirty water from room to room—it's the only way to keep your cleaning water actually clean.
Damp, Not Drenched
Wring your mop out until it’s just damp. You want the water to evaporate off the tile within a minute or two, not sit in puddles that soak into your grout lines.
Buff it Dry
If you have polished porcelain or marble, give it a quick once-over with a dry microfiber cloth or a clean towel at the end. It takes two minutes but kills any chance of streaks or water spots.
Pro Tips for Bathroom Floor & Wall Tiles: How to Stop Stains & Buildup
Keeping your bathroom floor tiles and wall tiles in top shape isn't about using harsh cleaners, it’s about using the right cleaning solution. If you stay on top of your weekly cleaning, hard water stains don't stand a chance. Use these pro-approved cleaning products on your tile surfaces and shower tiles now, and you won't be scrubbing at stubborn stains later. That’s how you get a bathroom that looks brand new for life.
For more information, call our friendly Tile For Life team on 04 1127 6281 today.
